Beginners in Fluid Art
Share
A guide for those ready to pour, play and discover the joy of painting with flow
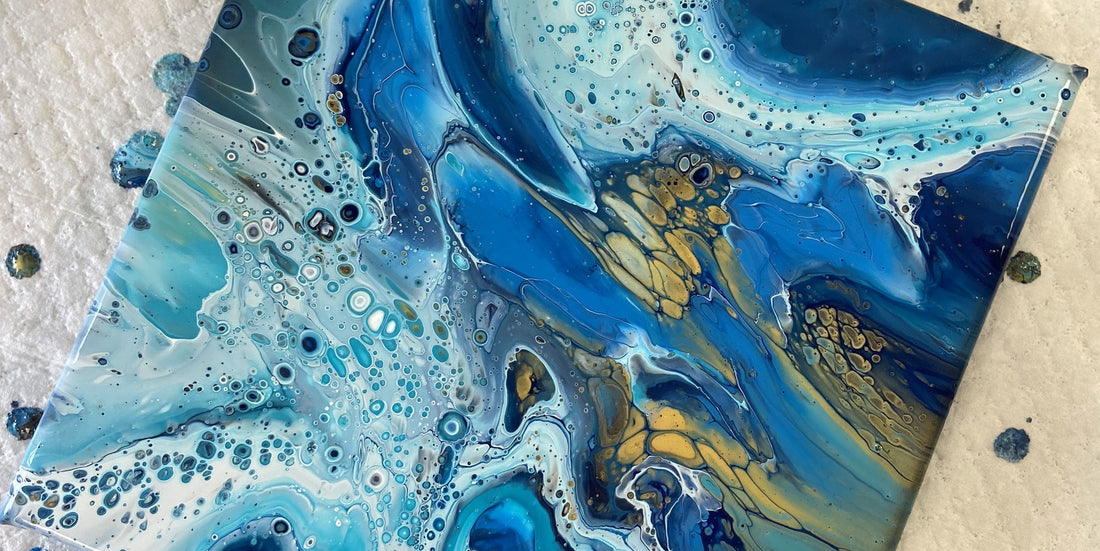
Fluid art is one of the most freeing and expressive ways to create, and it's easy to fall in love with its vibrant colours and unpredictable patterns. But for beginners, it can also feel a bit overwhelming — where do you start, what do you need, and how do you control the chaos (or should you even try)? Whether you're thinking about joining one of my workshops or exploring on your own, here are some tried-and-tested tips to help you begin with confidence.
1. Start with the Right Paints
You don’t need to buy the most expensive brands straight away, but quality does make a difference. Generally good brands of acrylic paints to use are Pebeo High Viscosity Studio paints, Graduate or System Three thinned with a pouring medium and water. Avoid adding too much water, as it can weaken the colour and make your painting crack as it dries. Click here for a step-by-step guide to mixing your paints.
Tip: Try a few colours you love rather than buying a full set. A limited palette often gives more harmonious results.
2. Use a Pouring Medium
This is the magic ingredient. A pouring medium helps your paint flow beautifully while keeping its colour vibrant and strong. There are many brands available (like Liquitex or Pebeo), or you can experiment with PVA-based alternatives to get started.
Don’t skip this step — it really makes a difference in how your paints behave on the canvas.
3. Gather the Essentials
You don’t need a full art studio to start fluid painting. Here are some basics:
- Canvas
- Acrylic paints
- Pouring medium
- Silicone cups and stirrers (reusable)
- Gloves and apron
- A level surface (very important)
- A plastic sheet or drop cloth to protect your space
Optional extras: silicone oil (for creating cells), a torch or heat gun (to pop bubbles), and palette knives or combs for extra effects.
4. Embrace the Unexpected
One of the joys of fluid art is that it has a mind of its own. Even experienced artists can’t fully predict how a pour will turn out — and that’s part of the magic.
Mindset matters. Try to let go of perfectionism and focus on enjoying the process. Watch how colours swirl and react, and allow the painting to evolve naturally.
5. Practise, Pour, Repeat
Like any art form, fluid painting gets better with practice. Try different techniques such as:
- Dirty pour – all colours in one cup, poured at once
- Flip cup – flip the cup onto the canvas for dramatic effects
- Swipes – pour paint, then swipe a tool across it
- Puddle pour – pour one colour into another to build a centre
Over time, you’ll learn how different colours and consistencies behave together—and that’s when the magic really starts to happen.
6. Let it Dry… Properly
After tilting your paint off the canvas to achieve a composition you are happy with, grying can take 24–72 hours, longer in colder conditions and depending on how thick the paint is. Keep your painting flat and out of direct sunlight or draughts. Be patient—it’s worth the wait.
7. Enjoy the Results (and Share Them)
Each pour is completely unique, which is what makes fluid art so rewarding. Frame your favourites, hang them at home, or give them as thoughtful gifts. And if you’re ready to go deeper, I’d love to welcome you to one of my Fluid Art Workshops in Poole – perfect for beginners looking for hands-on guidance and a creative, relaxed day out.
I have a number of beginners videos available to view on my YouTube Channel